Video uploaded, no audio so make sure you have your notes handy!
PDF to follow soon, let me know how you get on with this video to help shape future tutorials.
Ed
Untitled from warderoid on Vimeo.
Showing posts with label Rhino. Show all posts
Showing posts with label Rhino. Show all posts
Wednesday, 26 October 2011
Thursday, 29 September 2011
Paneling tools


It starts with a surface!

Using the plug in Paneling tools for Rhino 4, it is possible to create repeat patterns over solids, surfaces or 2D planes.

There are several pre defined shapes to sample.

Or it is possible to create your own.
More please!
Paneling tools
Elo!
Had some fun with the paneling tools plug it - without getting overly fancy, using a custom paneling grid on a surface - I was able to create an interesting surface pattern on 12mm ply!

A simple surface just over 200mm square, rebuilt with 6 u and v points, slightly edited to give depression and curvature.
The paneling grid was set to 15 in both U and V, for a rather densely populated surface, the custom shape was a simple paraboloid.
I opted for ply as it will illustrate the contours more so than acrylic would.


Thanks for looking :)
blobby thing
This was an intersting project, by the time I got around to starting it!
The model is a prototype for an instiliation, the model would be then moulded and cast in cermaics.
The data was from Rhino, and the model - being deeper than my CNC Mill could handel, was split into 4 and 3D printed on the Zcorp 510.
Once printed, they were Infiltrated with resin and joined, filled, sanded, 2K primed and sprayed a gloss white.
There wasnt one - but two! It took 3 days, mostly spent sanding, fillig, priming, sanding, filling, priming, sanding, filling priming - you get the picture. All this whilst trying to opperate a workshop with MA students running around!


 Overall I was pelased with the outcome - its been a while since I used alot of the finishing skills I had supposedly aquiered at Curvature Group!
The model is a prototype for an instiliation, the model would be then moulded and cast in cermaics.
The data was from Rhino, and the model - being deeper than my CNC Mill could handel, was split into 4 and 3D printed on the Zcorp 510.
Once printed, they were Infiltrated with resin and joined, filled, sanded, 2K primed and sprayed a gloss white.
There wasnt one - but two! It took 3 days, mostly spent sanding, fillig, priming, sanding, filling, priming, sanding, filling priming - you get the picture. All this whilst trying to opperate a workshop with MA students running around!
 Overall I was pelased with the outcome - its been a while since I used alot of the finishing skills I had supposedly aquiered at Curvature Group!
Wednesday, 24 August 2011


Monday, 13 June 2011
Paneling tools
Using the plug in Paneling tools for Rhino 4, it is possible to create repeat patterns over solids, surfaces or 2D planes.
There are several pre defined shapes to sample.


Or it is possible to create your own.


Tuesday, 3 May 2011
Patterns
Sneek peek at what will be a feature post, but early developments require a post of their own!
I have been working with Preeti our printmaking technician, and was given the brief to create some one of a kind lino prints, that could only have been produced by applying high end technology, in this case applying the use of Adobe Illustrator and our Trotec Laser cutters.


Our preliminary plan is firstly to build links between the two departments, in doing so exploring the benefits of applying digital technology to a well established discipline whilst producing some interesting artwork and discussion!
See you next time!
Wednesday, 20 October 2010
Super glue spray fail


superdrug's spray dispensers don't work with super glue.
I got around 3 pumps before the stupid thing stuck itself together.


those three pumps looked promising though - I ended up dropping glue onto the model - it was a pain in the proverbial but gives quick and durable results.
If you have a day to spare while the thing cures I would recommend using resin due to the infiltration qualities. Edit - Superglue FTW more costly but srsly its where its at!
Tuesday, 25 May 2010
Rhino CAM
Our pre dawn of existance CAM application is about 50% good - it is very unforgving on even the most well built CAD models.
Anyway - I delved into Rhino CAM - a plug in for Rhino 4 and offer a free demo on their webiste. I fed it a file that has been causing Excalibur to stall for around 33 hours only to let us down again and again and crash. To my suprise it took about 30 seconds for Rhino CAM to spit out a tool path - i'll bee damned.
Unfortuantely without the right post processor its unusabable on our machine. Maybe I can faf with the Post output settings but who wants to do that on a sunny day?
Anyway, have a couple of images to feast your eyes on!

Horizonal roughing - tool path generated very quickly - but i'm sure there must be a way to select a more material friendly region...

Horizontal finishing if I remember correctly. pretty fine stepover of only 10% of tool - all the stages are pretty strait forward.

And lastly, the output G code.
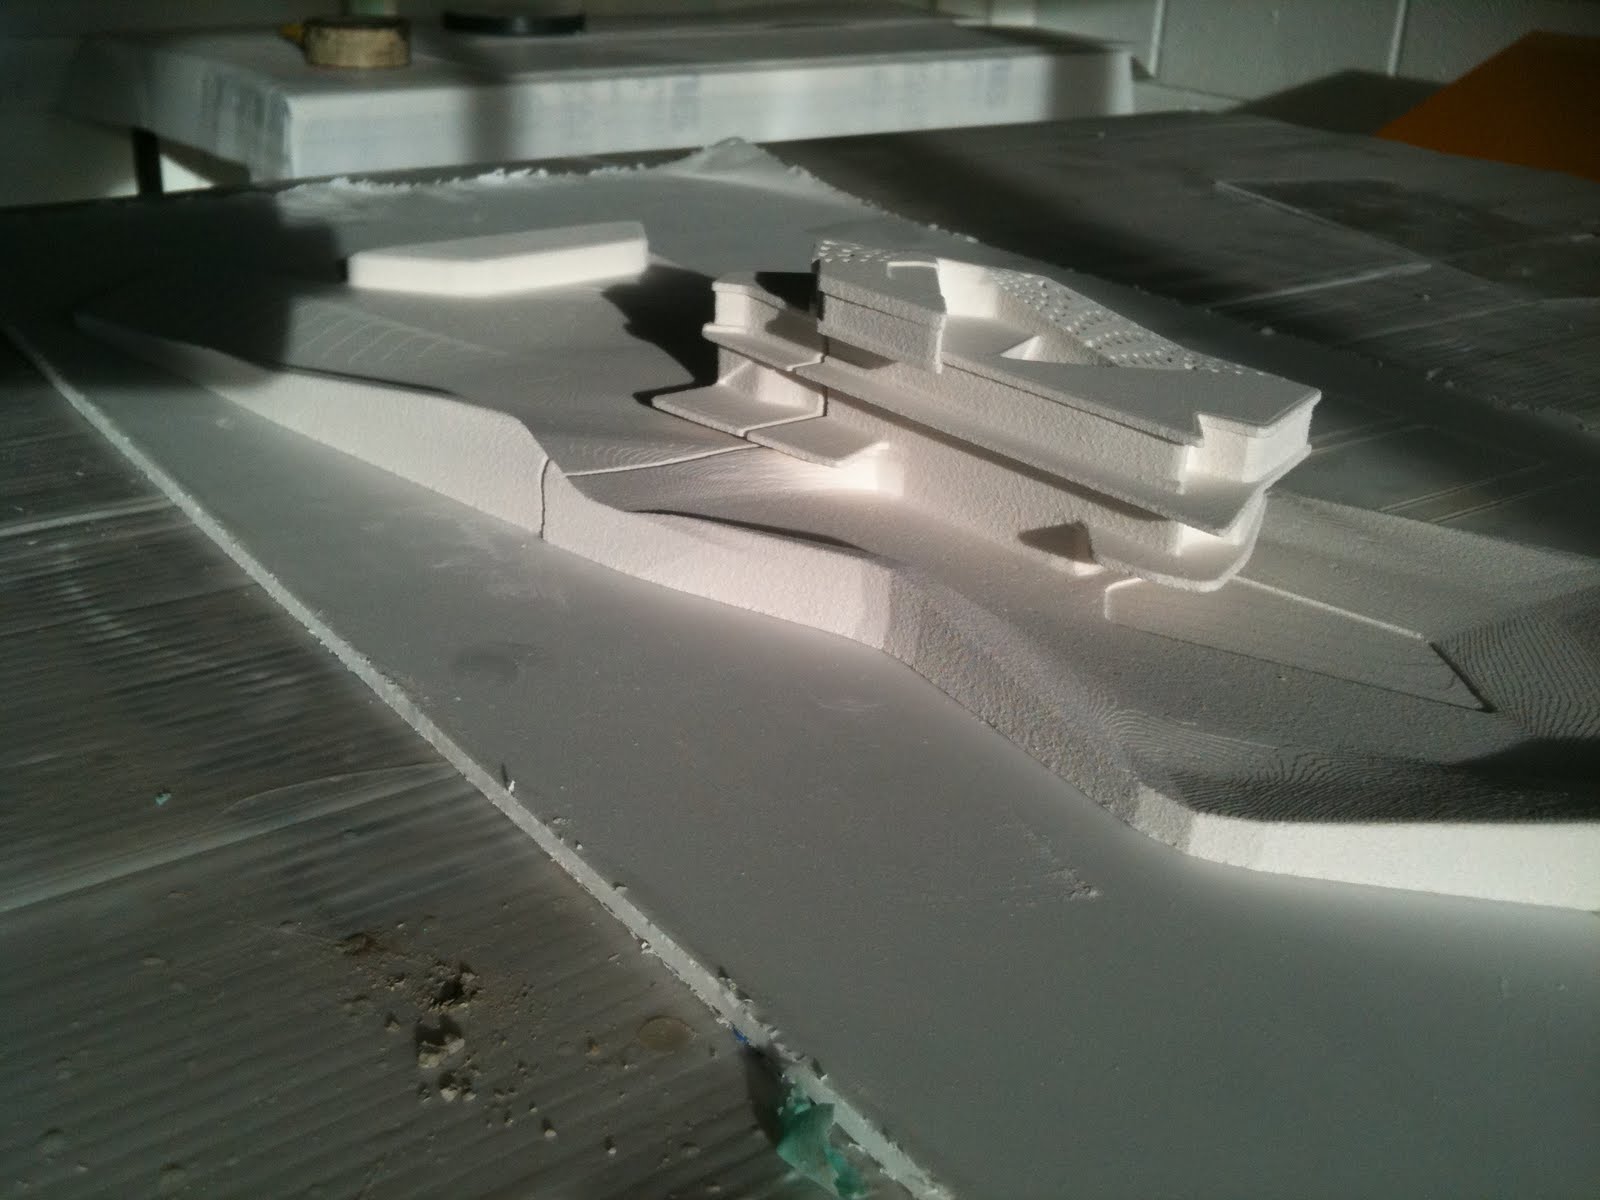
Digital Terrain Modeling
Using Digimap and Rhino 3D, Bournemouth Chine was milled from Birch ply.

and

and

The model is used as reference for Nathen's 3rd year BA Hons Architecture project, the rejuvination of a bridge.

and

and

The model is used as reference for Nathen's 3rd year BA Hons Architecture project, the rejuvination of a bridge.
Two sided milling appears to be working!
My forray into milling two sides of the same model seems to be paying off - whilst learning all the way.
Some say i'm messing about making my own model but.. well ok maybe i am.
Here's a pic to show the progress...

Mde from only 3 peices!
Some say i'm messing about making my own model but.. well ok maybe i am.
Here's a pic to show the progress...

Mde from only 3 peices!
Rhino meets Fashion Product
Quiet morning in the workshop allowed me to go over a few of the tools Rhino 3D has to offer to speed things up when it comes to speeding up drawing for the laser cutter.
The brief was to make a necklace with alternating patterns, with bulge in the middle and smaller on both ends.


and

JaquiLaw.co.uk
The brief was to make a necklace with alternating patterns, with bulge in the middle and smaller on both ends.


and

JaquiLaw.co.uk
Subscribe to:
Posts (Atom)